July 11, 2026
Laser-Etched amiibo Display
DIY Display Showcase
DIY Video Games
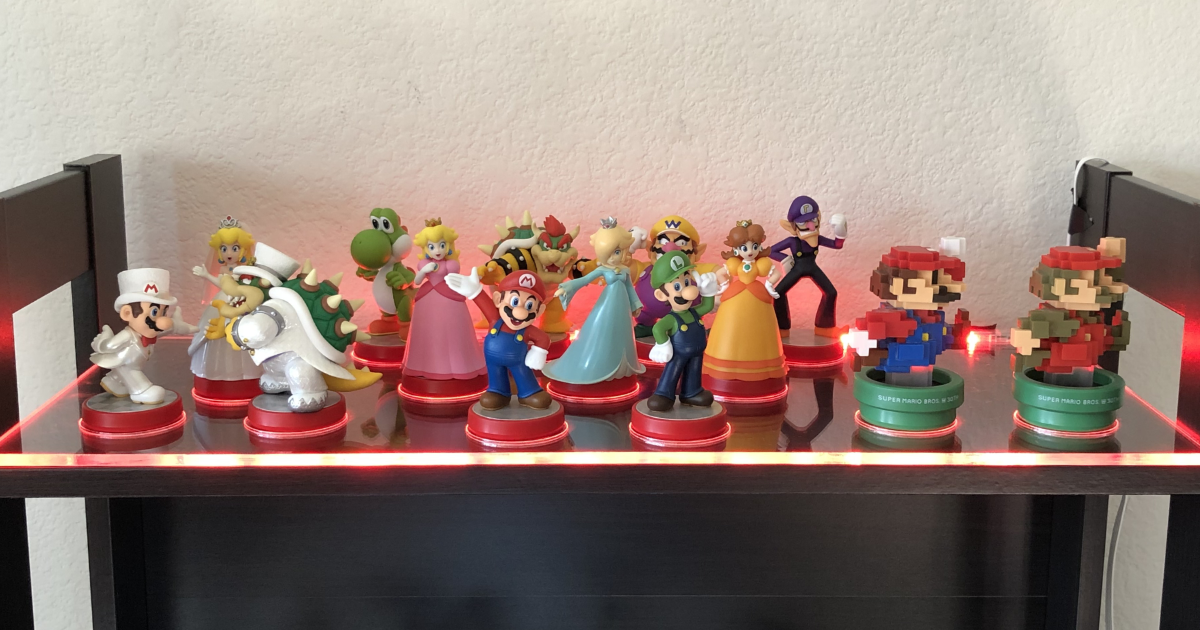
This is an older project of mine, but I realized I never shared this on my blog, so I might as well now. Nintendo has released a lot of amiibo since their debut in 2014. While we have amiibo representing many different game series today, their humble origins started as real-life equivalents of the trophies from the Super Smash Bros. series.
Today, Nintendo has released an amiibo figure for every single fighter in Super Smash Bros. Ultimate, but there has never been one proper way to display them all. This has led collectors and fans to come up with very creative ways of displaying their amiibo collections.
When I was in my sophomore year of college, I started working with my school’s laser-etcher in my free time. I quickly realized that being able to make precise shape cutouts in flat slates of material would be helpful for displaying amiibo figures. I made a few prototypes in cardboard and wood that would slide into a shelf I was using. I made one of the prototypes out of acrylic.
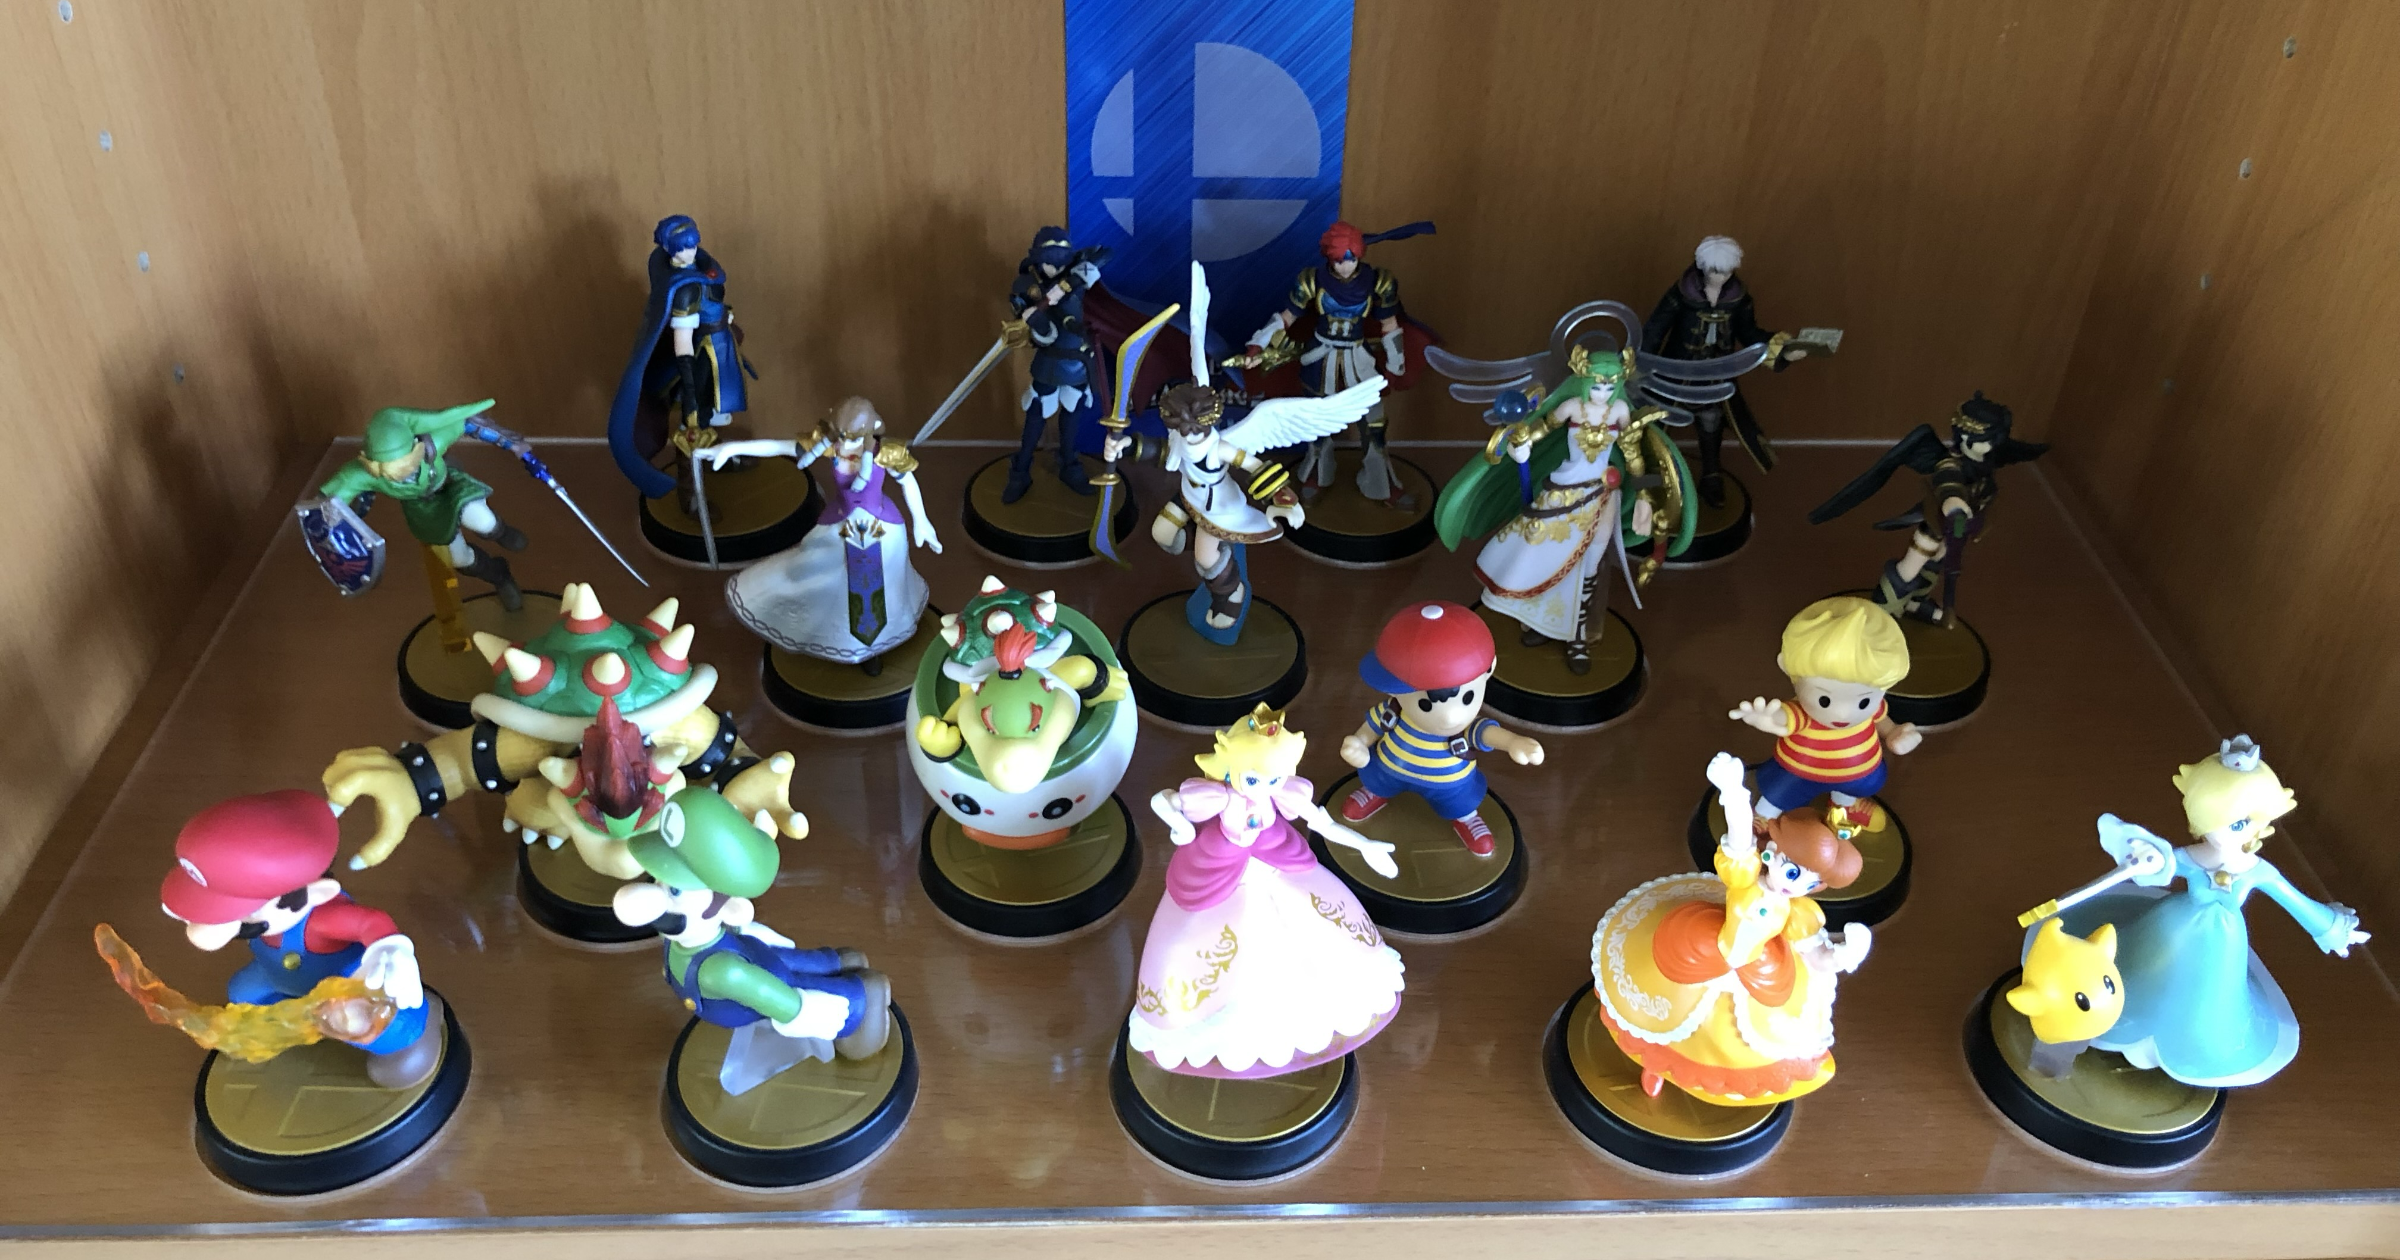
I eventually upgraded to a LAIVA bookcase from IKEA. When I started the new semester in August, I started work on some new designs that would match the shelves of this bookcase.
Prototyping was a bit difficult as the bookcase was in California, while the laser-etcher was in Arizona, so I had to make some assumptions and iterating was a bit slow. I kept an unassembled shelf of the LAIVA bookcase in my dorm to make testing easier. I also figured acrylic would diffuse LEDs well for a cool effect, so I sized the acrylic to the shelf and left a cutout for an IKEA LEDBERG LED strip.
My next revelation is that I could raster character emblems into the acrylic. This would make it easy to know which figures go where when not on the shelf, while also serving as a placeholder for figures that haven’t been collected or released yet.
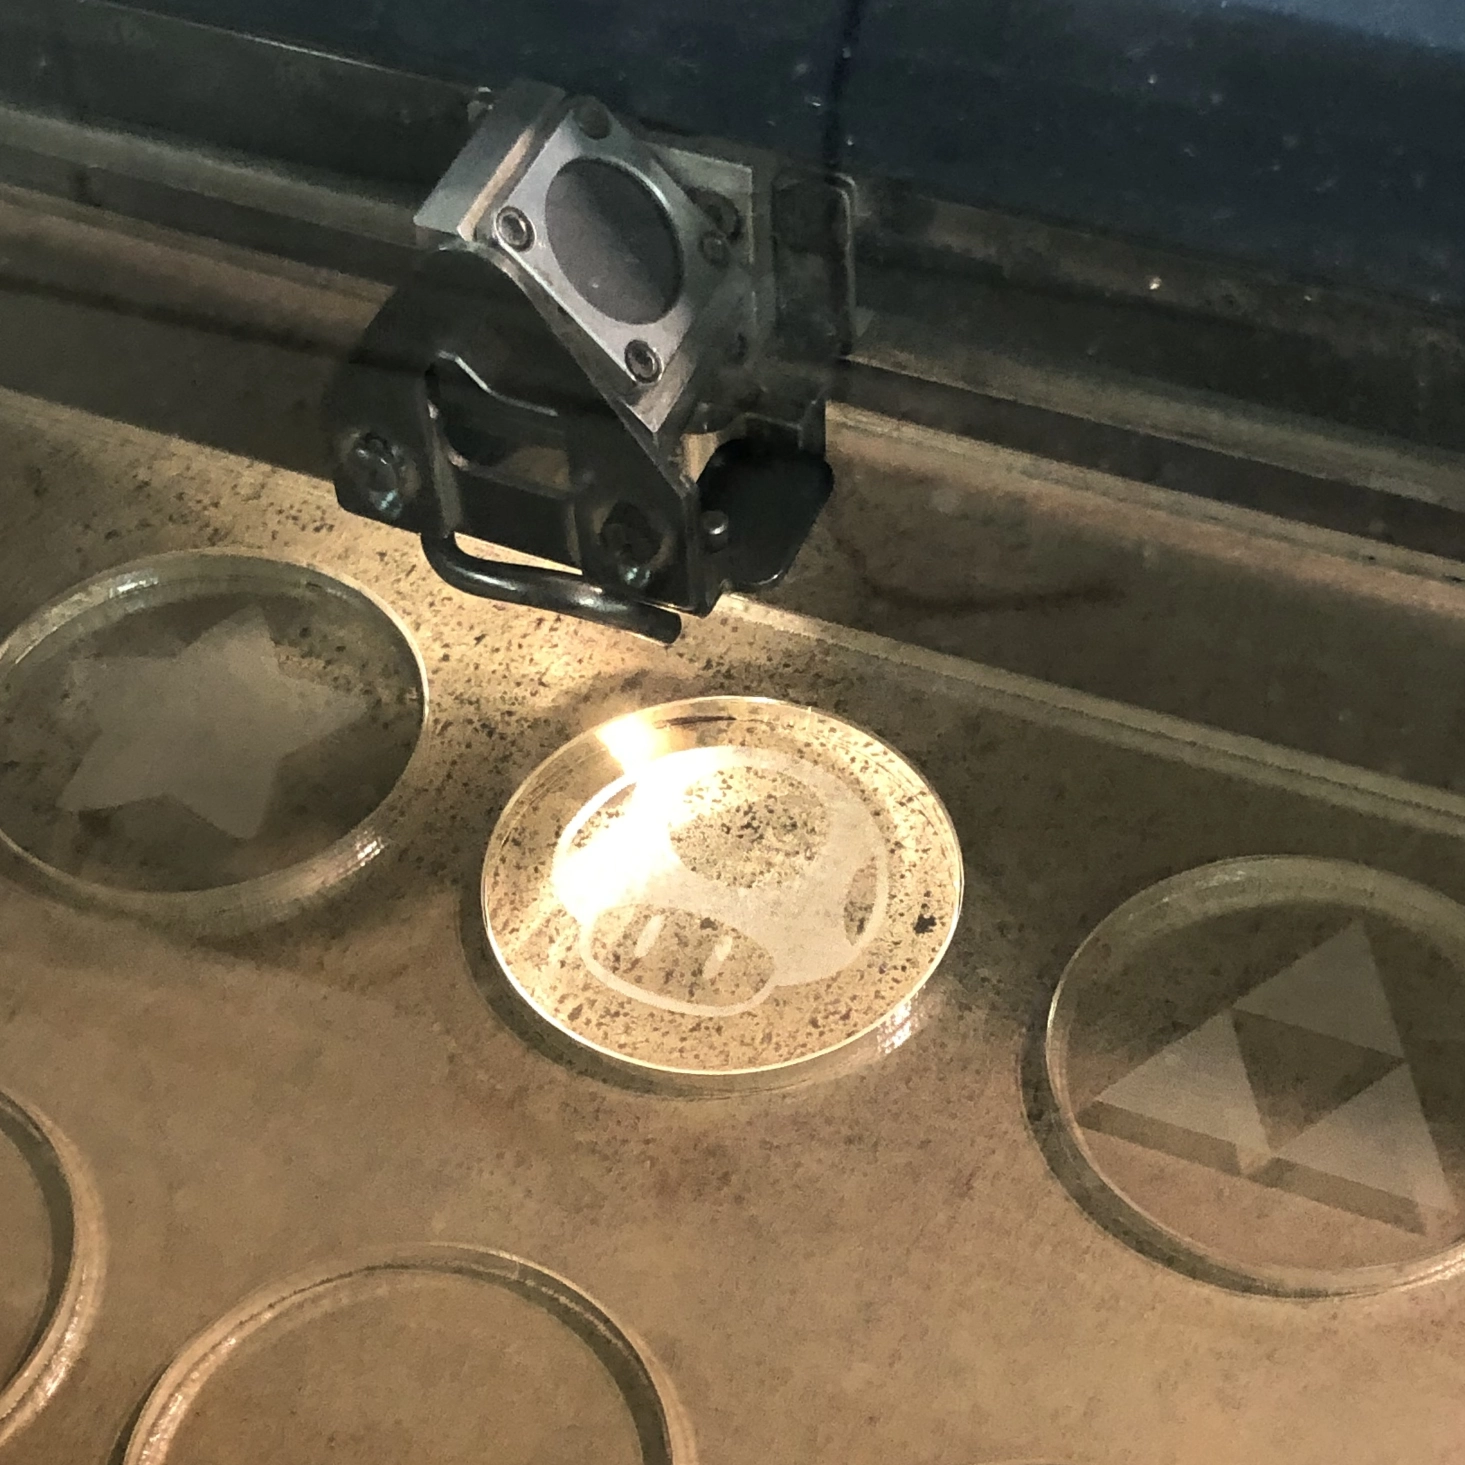
Instead of having puck-shaped holes for the amiibo bases, the pucks would remain in the cutout, which would allow the emblems to be swapped if needed. The LEDs also played really well with the emblems to up the presentation.
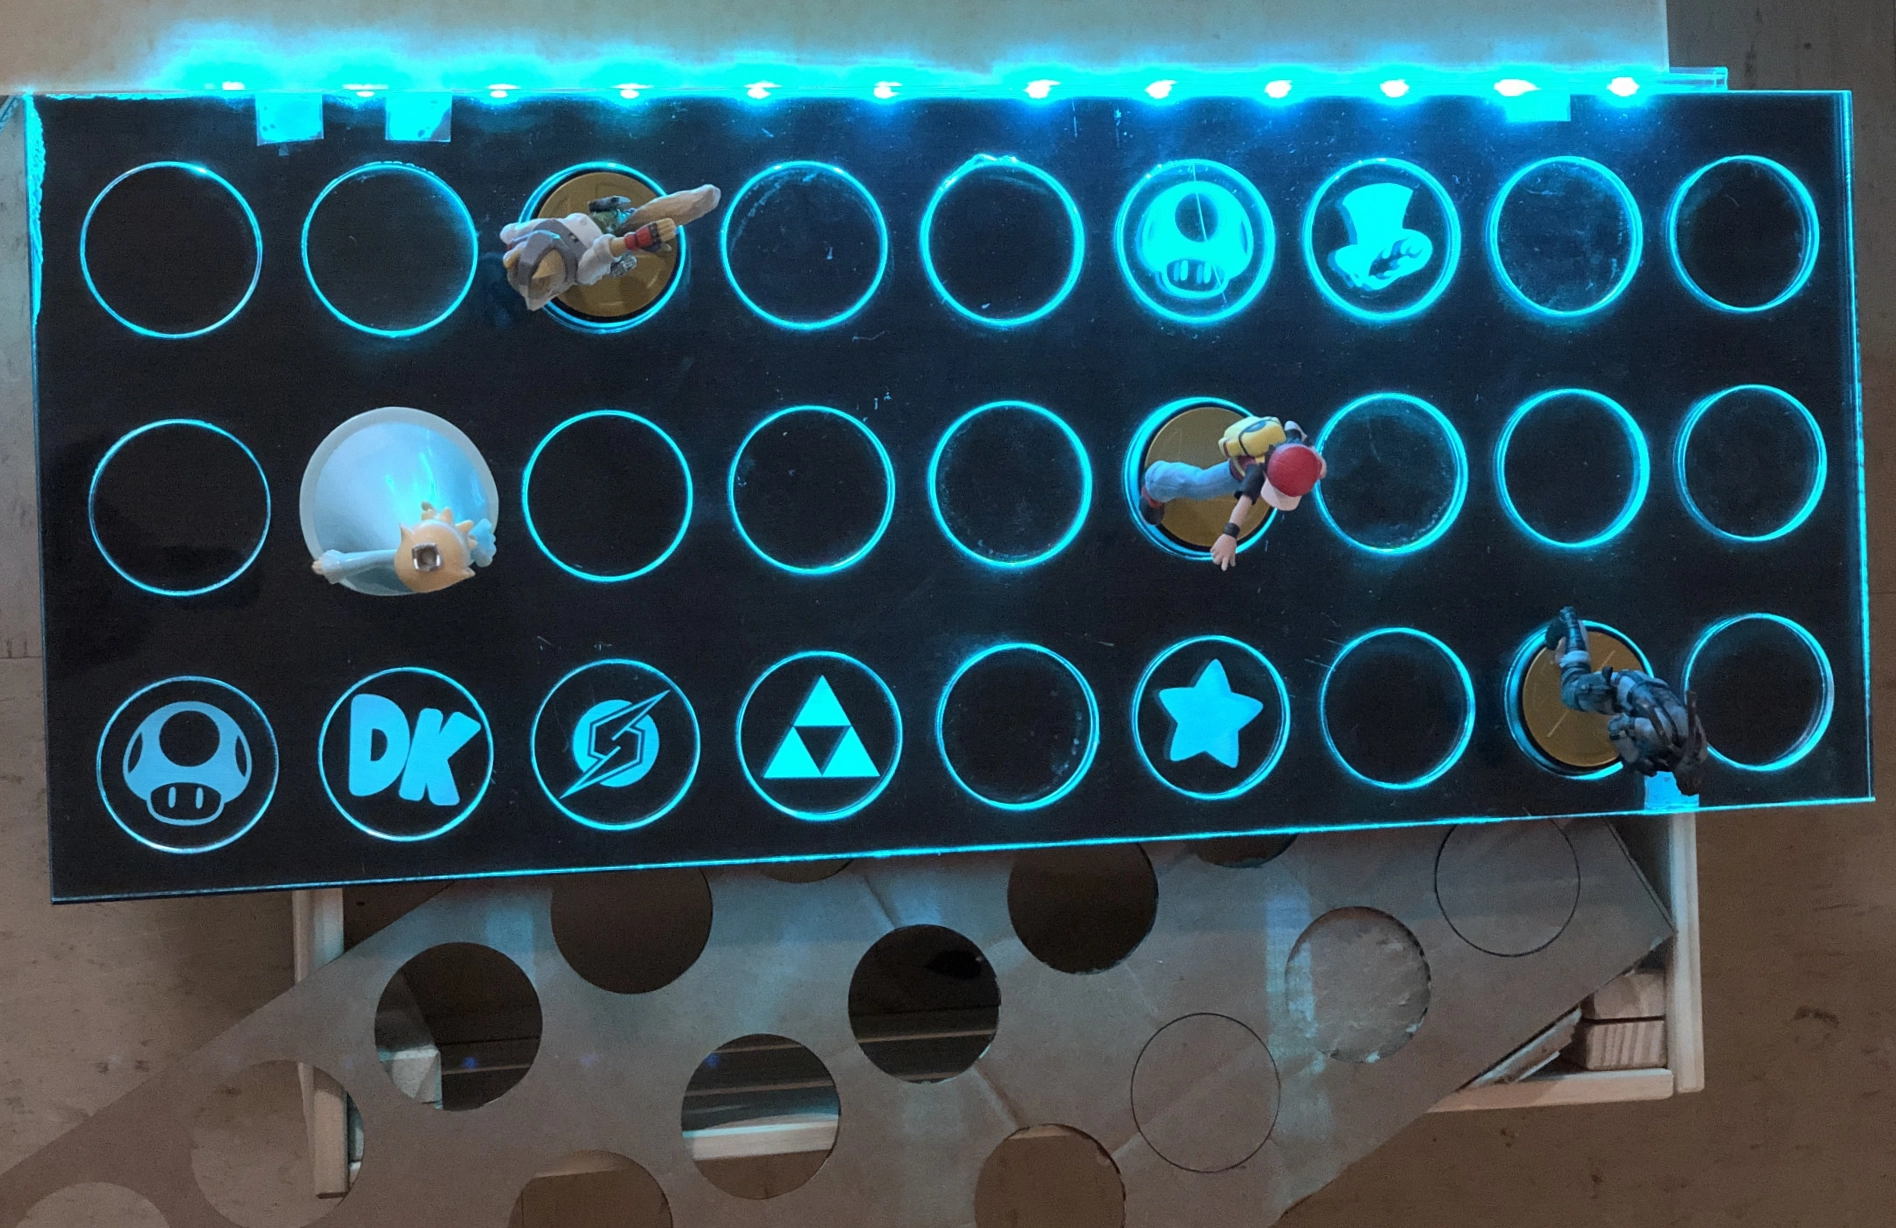
I originally spaced the amiibo equally apart, which would allow for 27 amiibo on one shelf. However, that didn’t pan out due to some amiibo being larger. I wanted equal spacing, so I had to base my spacing on the largest amiibo. At the time, this was Ridley. I staggered the placement of the figures. While this design stored 7 fewer amiibo per shelf, it was a good balance.
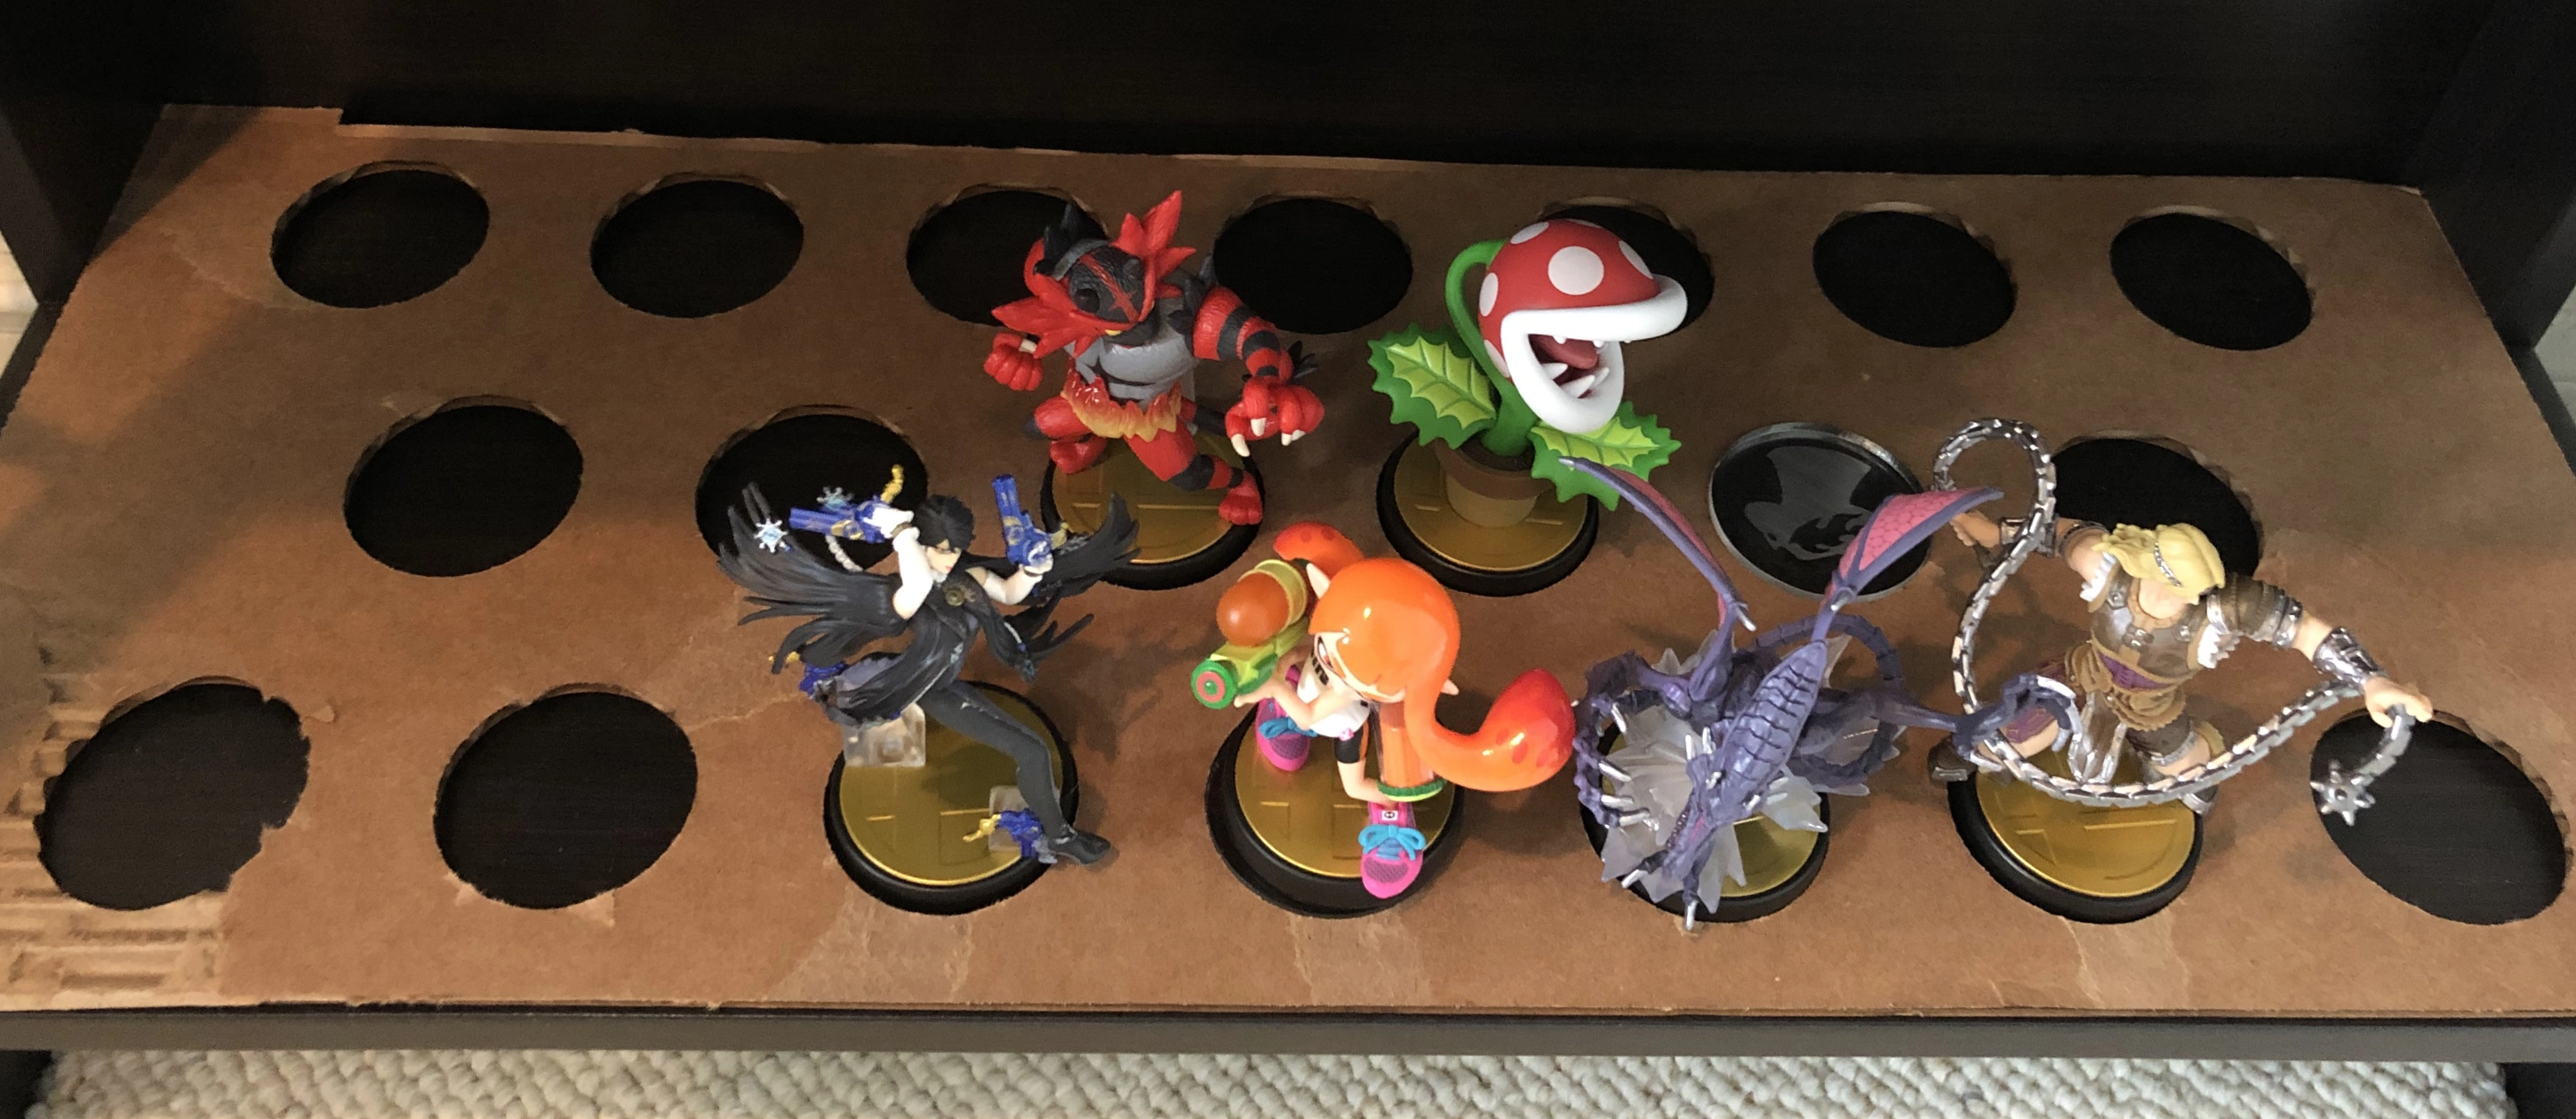
It’s important to note that during the design phase, I had no idea how many amiibo there would be. Super Smash Bros. Ultimate was in the midst of its first wave of DLC. The public didn’t know there would be a second wave, and it was possible that DLC fighters wouldn’t be made into amiibo figures. That doesn’t even consider that some fighters have multiple amiibo figures. As a result, I simply planned for five identical shelves. I actually kept a list to keep track of the characters as DLC was released.
I also made one variant shelf for the Super Mario Bros. series of amiibo.
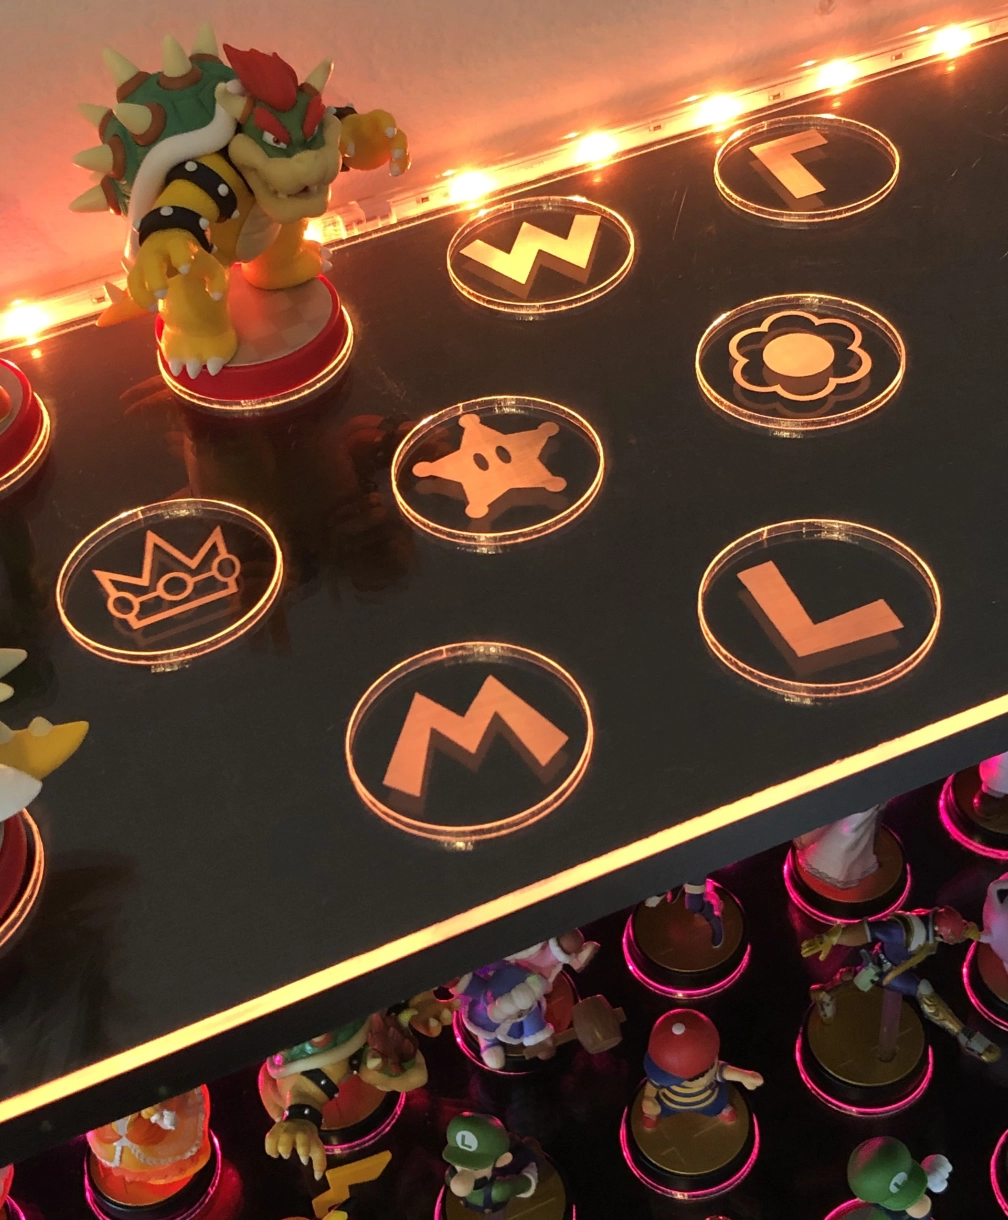
With slow iteration came a lot of trial and error. Because pucks were interchangeable, if etching an emblem went poorly, I could swap it out for a better one. But because I was using almost the entire platform of the laser-etcher, it was losing focus on some of the further points. This meant inconsistent rasters for the emblems and not cutting all the way through the ¼-inch acrylic at some points. At some point, I switched to my school’s larger and more powerful laser-etcher for much better and more consistent results.
The larger laser-etcher provided me with the results I was looking for and I completed the remainder of the shelves with this.
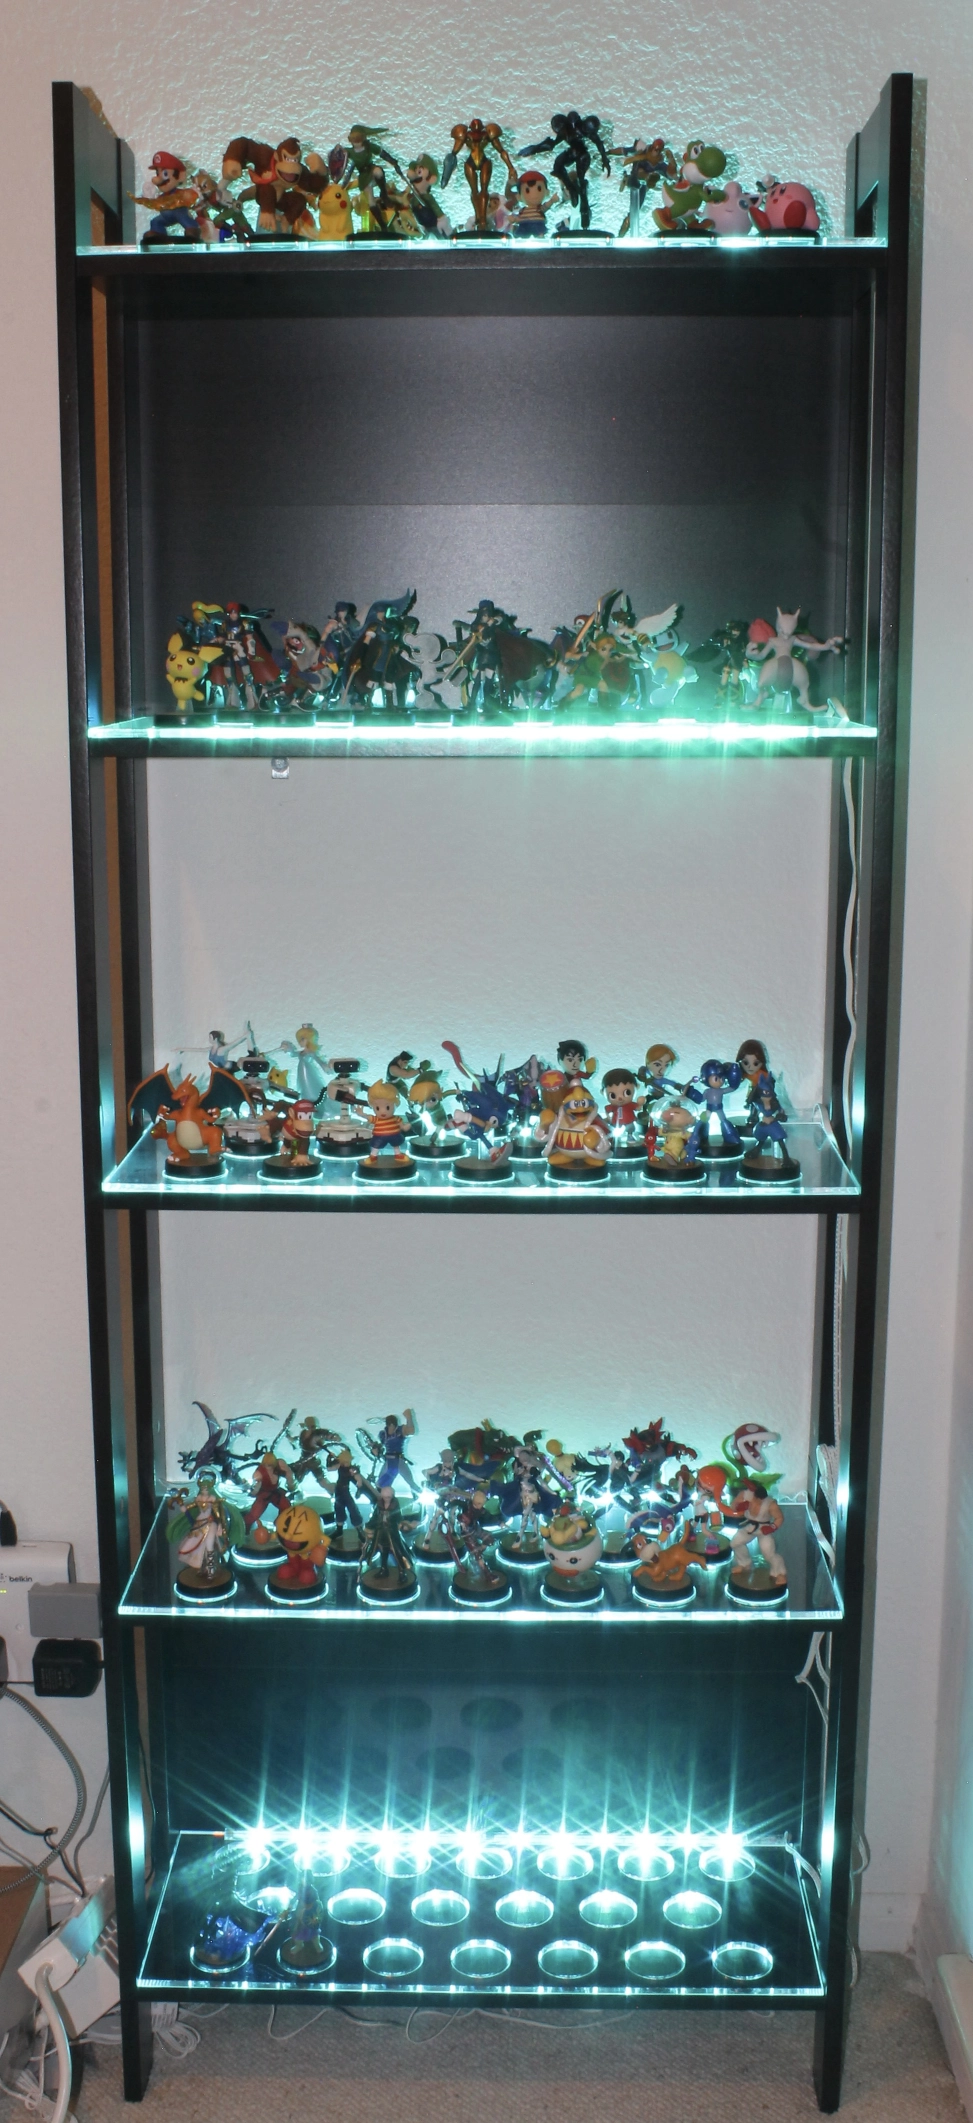
Overall, I was pretty satisfied with the end result. Looking back, the only improvements I would make would be to add cable management and dust protection.